Friday, August 17, 2012

Makeup Your Face

Hello Loves,
     Wanted to take a break from cooking/baking posts and do a beauty post.  I told you in my Pretty Addictions post (btw I have more of those beautiful colors coming so keep an eye out for that) how much I love indie companies.  Another one of my faves (I have 10...maybe 20) Makeup Your Face.  I ordered a blogger/review pack as in my usual fashion with ordering from a new company.

Makeup Your Face

I received several samples a full size collection, 4 full size shadows and a lippie.  There were NO colors  that I didn't like, but there were SEVERAL that I loved.  Like the entire ultra matte collection. LOVES MATTES!  Also, the owner was so sweet in creating a review package for me at an affordable price.  I have since kept in contact with her and continue to buy her amazing products.

The Scentsy Inspired Collection


The Ultra Matte Collection


The Vegas Collection


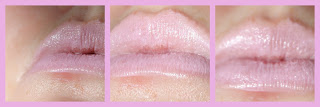
Cupcake Icing Lippie

Singles

Next post on this fabulous company will include her amazing glitter nail polishes eek!

Wednesday, August 15, 2012

Happy 100th Julia!


Hello Lovies! 
    Many of you may not know but today would have been Julia Child's 100th birthday!!  Many blogs in the baking/cooking community decided to make one of her recipes and post about it.  I have her "Mastering the Art of French cooking," and being that this weather has given me a case of the ick I did feel much like french cooking,but I had to pay respect to such an amazing woman.

                        I picked a simple recipe-Scrambled eggs or Oeufs Brouilles.

Put eggs, milk, salt, and pepper in a bowl

 
Whisk until just mixed      


Put butter is skillet over moderately low heat

Melt butter
Stir slowly for 2-3mins

then stor faster as it all begins to come together.

add 1 Tbsp soften butter to eggs while hot (May also use cream)
she recommends garnishing with parsley but I only had dried

Happy Birthday Julia!!


 Julia Child's Scrambled Eggs
 (serves 2)
4 eggs
salt and pepper
2 teaspoons milk
1 Tablespoon softened butter or cream                                         


Monday, August 13, 2012

Lemon Glazed Blueberry Doughnuts

Morning Loves!!
I should start this post by saying I love fried things; like all true southerners should.  That being said I HATE to fry things.  It is a big mess, you usually get burnt, and all that grease!  So, as much as I love doughnuts their appearance in my kitchen has been sadly absent...UNTIL I found this recipe making BAKED doughnuts...and in a truly adorable pan.   I set out to find the pan and got the LAST one on the shelf.  That was like a sign from God.


Baked Blueberry Donuts with a Lemon Glaze

From Mom Advice

Ingredients:

2 cups cake flour (or 1 3/4 cup all-purpose flour + 1/4 cup cornstarch)
3/4 cup sugar
2 tsp baking powder
1 tsp salt
zest from 1 lemon
3/4 cup milk
2 eggs, lightly beaten
2 Tbsp butter
1 tsp vanilla extract
1/2 cup blueberries, halved
Lemon Glaze:
1 1/2 cups powdered sugar
1 Tbsp milk
1 Tbsp lemon juice (from the lemon you zested)
1/2 tsp vanilla extract
Directions:
Whisk together the cake flour, sugar, baking powder and salt into a large bowl.  Add in the lemon zest and whisk this into your dry ingredients. Pour in the milk, eggs, butter and vanilla extract. Gently mix the ingredients together. Be careful not to over-mix the batter. Fold in the halved blueberries carefully. Lightly grease a doughnut pan with non-stick cooking spray. Carefully spoon the batter into the doughnut pan, filling each one halfway. Bake the doughnuts at 400 F for 8-9 minutes. The donuts will remain light in color, but should spring back when pressed.
For the glaze: Put the powdered sugar in a large bowl. Add in the lemon juice, milk and vanilla extract. Whisk to combine. If the glaze is too thick, add additional lemon juice or milk, 1/2 teaspoon at a time until desired consistency is reached.
Once the doughnuts are done baking, let them cool in the doughnut pan for 4 minutes. Carefully remove the donuts from the pan.  Dip one side of each doughnut in the glaze. Set the doughnuts on top of a cooling rack with a baking sheet underneath. Allow the glaze on the doughnuts to dry and serve immediately with big glasses of ice cold milk.
Prep Time: 5-7 minutes
Total Time: 20 minutes


I will warn you. Some people in our house found the lemon to be too strong so add with a light hand.

Saturday, August 11, 2012

Cherry Pie Cupcakes and Vanilla Swiss Buttercream

Howdy Loves!!
I've been digging baking things in cakes for awhile, but everything changed when I found the bake it in a cake website.  Pies in cupcakes...what kind of magic is this, you may ask.  Easy magic!!  Possibilities are endless and oh so tastey!!

Cherry Pie Cupcakes
Adapted from Bake it in a Cake
Makes about 22-24 cupcakes.
For the blueberry pies you’ll need:
2 packages of refrigerated pie dough (enough for one two crust pie)
1 can cherry pie filling
For the cupcakes you’ll need:
1 1/2 sticks unsalted butter
1 1/2 c. granulated sugar
3 eggs
2 t. baking powder
1/2 t. baking soda
1/4 t. salt
2 t. vanilla
2 1/2 c. flour
1 1/3 c. whole milk

Directions: 
Pre-heat the oven to 375 degrees (F).
Roll out the pie dough and use a round cookie cutter (or small juice glass) to cut out 20-22 pie crust rounds that are large enough to fit into your mini cupcake tin, so the bottom and sides of the tin are fully covered. Spoon a teaspoon or so of cherry filling into each pie shell. Cut out 20-22 more pie crust rounds and place them on top of each mini pie, pinching the edges of the bottom crust and the top crust together so they’re sealed. Use a sharp knife to cut a small X into the top of each pie, and bake for 12-15 minutes until the crusts are golden brown (the pie filling might escape a bit—that’s okay!).
Allow the pies to cool while you make the cupcake batter.
Turn down the oven to 350 degrees (F).
Cream together the butter and sugar until fluffy. Add the eggs, one at a time, and stir until combined. Then add the baking soda, baking powder, vanilla, and salt. Mix for about a minute, until creamy (be sure to scrape down the sides of the bowl once or twice, to ensure everything is getting worked in). Then add the milk and flour, alternating between the two ingredients (to avoid lumps) until the batter is smooth and everything is well combined.
Scoop a heaping tablespoon of batter into your paper-lined cupcake tins. Place one cooled pie into the center of the cupcake tin and gently press it into the batter (but not all the way to the bottom). Top with another heaping tablespoon of batter, so that the pie is completely covered and the cupcake tins are about 3/4 of the way full.
Bake for about 22-25 minutes, until the cake is golden brown and set (it will bounce back when you gently press your finger into a cupcake).
Allow the cupcakes to cool, while you make the buttercream.


Vanilla Swiss Meringue Buttercream
from Annies Eats

Ingredients:
5 large egg whites
1 cup plus 2 tbsp. sugar
Pinch of salt
1 lb. (4 sticks) unsalted butter, at room temperature
2 tsp. vanilla extract
Directions:
To make the frosting, combine the egg whites, sugar and salt in a heatproof bowl set over a pot of simmering water.  Heat, whisking frequently, until the mixture reaches 160° F and the sugar has dissolved.
Transfer the mixture to the bowl of a stand mixer fitted with the whisk attachment.  Beat on medium-high speed until stiff peaks form and the mixture has cooled to room temperature, about 8 minutes.
Reduce the speed to medium and add the butter, 2 tablespoons at a time, adding more once each addition has been incorporated.  If the frosting looks soupy or curdled, continue to beat on medium-high speed until thick and smooth again, about 3-5 minutes more (don’t worry, it will come together!)  Stir in the vanilla extract and mix just until incorporated.  Tint with gel icing color as desired.
Keep buttercream at room temperature if using the same day, or transfer to an airtight container and refrigerate up to 3 days or freeze up to 1 month. Before using, bring to room temperature and beat with paddle attachment on low speed until smooth again, about 5 minutes.

I really liked these however next time I would leave the top crust off the pie and add more filling.  Also check the cupcakes after 10mins they bake quickly.

Wednesday, August 8, 2012

Strawberries & Cream

Afternoon lovlies!  Phew been awhile since I posted a recipe.  I'm going to try to post more all around things.  Recipes, Beauty/Product Reviews, and just general shenanigans I get myself into.  Also will try to blog a couple of times a week, just in case any of you were missing me :)

If you don't know, one of my favorite fruits is strawberries.  I can eat them by the box full and never tire of them.  Naked, sugared, whip cream, baked, dipped, or any other way you can think of I just LOVE them.  What better way to beat this crazy heat (seriously 109 is getting a bit crazy!) than to make a delectable strawberry cupcake with a cream cheese frosting?  A delectable strawberry cupcake with WHIPPED cream cheese frosting.  Oh yes I went there.  These are almost the perfect cupcake (I'm a chocoholic and the lack of chocolate stops it from being perfect).

Strawberries & Cream

Pink Lady Cake
Adapted from Smitten Kitchen

For the cake
4 1/2 cups cake flour
3 cups sugar
5 1/4 teaspoons baking powder
3/4 teaspoon salt
3 sticks (12 ounces) unsalted butter, at room temperature
1 1/2 cups pureed frozen strawberries
8 egg whites
2/3 cup milk
Pink Food Coloring Gel

Make the cake
1. Preheat the oven to 350oF. Line 3 cupcake pans with liners.
2. Put the flour, sugar, baking powder, and salt in a large mixer bowl. With the electric mixer on low speed, blend for 30 seconds. Add the butter and strawberry puree and mix to blend the ingredients. Raise the speed to medium and beat until light and fluffy, 2 to 3 minutes; the batter will resemble strawberry ice cream at this point. (Deb note: I must warn you not to try the batter at this point. Not even a smear of it. How unbearably good it is will shock you, and lead to more dipping. Only you can stop this from coming to pass.)
3. In another large bowl, whisk together the egg whites, milk and pink food dye, if using, to blend. Add the whites to the batter in two or three additions, scraping down the sides of the bowl well and mixing only to incorporate after each addition. Divide the batter among the three prepared pans.
4. Bake the cupcakes 15-22 minutes, or until a cake tester or wooden toothpick inserted into the center comes out clean. Allow the layers to cool in the pans for 10 to 15 minutes.  Let stand until completely cooled before icing the cake, at least an hour.
**Also makes a 3 layer cake.  Use 3 8in cake pans and bake 30-35 minutes**

Ms. Humble's Whipped Cream Cheese Frosting
16oz cream cheese, room temperature
1 1/2 cup powdered sugar
1 teaspoon vanilla
1 cup heavy cream, cold. Higher the fat content, the better (I'm using 40% Ultra)

Beat the cheese, sugar and vanilla until smooth and fluffy. In a separate bowl,
beat the heavy cream to nearly stiff peaks, then add the whipped cream into the
cheese mixture and quickly and briefly beat to combine. Do not over beat.


I also loved the hot pink color (ok I added a lot of pink food coloring) and it is what inspired me to make them at the time I did; because one of my favorite cosmetic companies celebrated their first birthday in June.  I'll be posting on them soon!! 
Rockeresque Beauty Company


Also I got those simply GORGEOUS cupcake liners and yummy sprinkles at a bakery supply site called Sweet Cuppin Cakes.  Cutest name right?  I was made aware of this site and won a $50 giftcard for their site on Cupcake Rehab.  I simply adore Cupcake Rehab.  Check it out!